Solar Camera Battery Life Explained — What SA Homeowners Need to Know
Solar camera battery life is the question every South African buyer asks before purchasing — and it’s the right question to ask. The battery is the heart of the entire system. Get a camera with a solid battery setup, position the solar panel correctly, and your camera runs indefinitely with zero input from you. Get it wrong and you’re climbing a ladder every few weeks to recharge a camera that was supposed to look after itself.
This guide breaks down exactly how solar camera batteries work, what affects how long they last, and what you can do to maximise performance in South African conditions — including through load shedding and cloudy Highveld winters.
If you’ve just installed your camera and want to make sure it’s set up for maximum battery performance, this pairs directly with our solar camera installation guide.
How Long Does a Solar Camera Battery Actually Last?
On a full charge with no additional solar input at all, most quality solar security cameras will run for between 2 and 7 days depending on battery capacity, motion event frequency, and whether night vision is active. In normal South African conditions — where the camera is receiving daily sunlight — the battery should never fully deplete because the solar panel keeps topping it up continuously throughout the day.
Think of it less like a phone battery you drain and recharge, and more like a car battery that’s always connected to an alternator. The solar panel is the alternator — it keeps the battery in a constant state of charge as long as the sun is doing its job. Under good conditions, with a properly positioned north-facing panel, your camera battery stays between 80–100% charge indefinitely without any manual intervention.
The 2–7 day standalone figure only becomes relevant during extended bad weather or if the panel is poorly positioned. In Johannesburg, Cape Town, or Durban — three of the sunniest metropolitan areas in the world — hitting the low end of that range under normal conditions would be unusual.
What Battery Capacity Should You Look For?
Battery capacity is measured in milliamp hours (mAh) — the higher the number, the more energy the battery can store, and the longer the camera runs without solar input. For South African buyers, here’s a practical breakdown of what different capacity ranges mean in real-world terms:
| Battery Capacity | Standalone Runtime (No Sun) | Best For |
|---|---|---|
| 5,000–8,000 mAh | 1–2 days | Mild climates, consistent sun, low motion areas |
| 10,000–15,000 mAh | 3–5 days | Most SA homes — good balance of size and performance |
| 18,000–20,000 mAh | 5–7 days | High-traffic areas, cloudy regions, farms, remote properties |
| 20,000 mAh+ | 7+ days | Large properties, warehouses, extended low-sun periods |
For the average South African home in an urban or suburban setting, a camera with 10,000–15,000 mAh hits the sweet spot. It’s large enough to handle a few consecutive cloudy days without drama, but not so large that the camera becomes bulky and awkward to mount. If you’re installing on a remote farm or a property in a consistently overcast coastal area like parts of the Eastern Cape, lean toward the higher end.
What Factors Affect Solar Camera Battery Life?
Several variables affect how fast your battery drains and how efficiently the solar panel replenishes it. Understanding these helps you make smart decisions about placement, settings, and which camera to buy.
Motion event frequency is the biggest drain on battery life. Every time the camera detects motion, it wakes from standby, starts recording, activates IR night vision if needed, and sends a push notification — all of which consume power. A camera covering a busy main road will drain its battery significantly faster than one covering a quiet side gate. If you’re getting excessive motion alerts, narrow your detection zone in the app to reduce unnecessary wake-ups.
Night vision usage is the second biggest drain. Infrared LEDs consume meaningful power, and if your camera is in an area with frequent night movement — a busy street, a neighbourhood with dogs — it’s activating those LEDs regularly throughout the night. Cameras with colour night vision (which uses a white spotlight instead of IR) consume even more power. Factor this in if you’re choosing between a standard IR camera and a spotlight model.
WiFi signal strength affects battery more than most people realise. A camera struggling to maintain a weak WiFi signal works harder to stay connected, which increases power consumption noticeably. If your camera is at the far edge of your WiFi range, consider adding a WiFi extender rather than accepting the battery penalty.
Temperature plays a role too, particularly in South Africa’s extremes. Lithium-ion batteries perform best between 15°C and 35°C. In the Limpopo summer when temperatures push 40°C+, or in a Karoo winter night dropping below 5°C, battery performance takes a measurable hit. This isn’t unique to solar cameras — it affects all lithium battery devices.

How Does Load Shedding Affect the Battery?
Load shedding has zero direct effect on your solar camera battery — and that’s precisely the point. Your camera’s power system operates completely independently of the mains grid. Eskom cutting power doesn’t touch the solar panel, the battery, or the camera’s operation in any way.
What load shedding does affect is your WiFi router. When your router goes down, the camera loses its internet connection and can’t push alerts to your phone or sync footage to the cloud. This is why inserting a micro SD card during installation — as covered in the [solar camera installation guide] — is non-negotiable for SA homeowners. With an SD card in place, the camera continues recording locally throughout the entire load shedding window and syncs to the cloud the moment WiFi is restored.
For complete load shedding resilience, some SA buyers pair their router with a small UPS (Uninterruptible Power Supply) or a Mini UPS device that keeps the router running during outages.
Mini UPS for WiFi Routers Explained
This combination — solar camera plus a router UPS — gives you genuine 24/7 protection regardless of what stage load shedding Eskom throws at you.
How to Maximise Your Solar Camera Battery Life
Getting the most out of your battery is mostly about smart setup decisions made once at installation. These aren’t complicated tweaks — they’re straightforward adjustments that compound into significantly better performance over time.
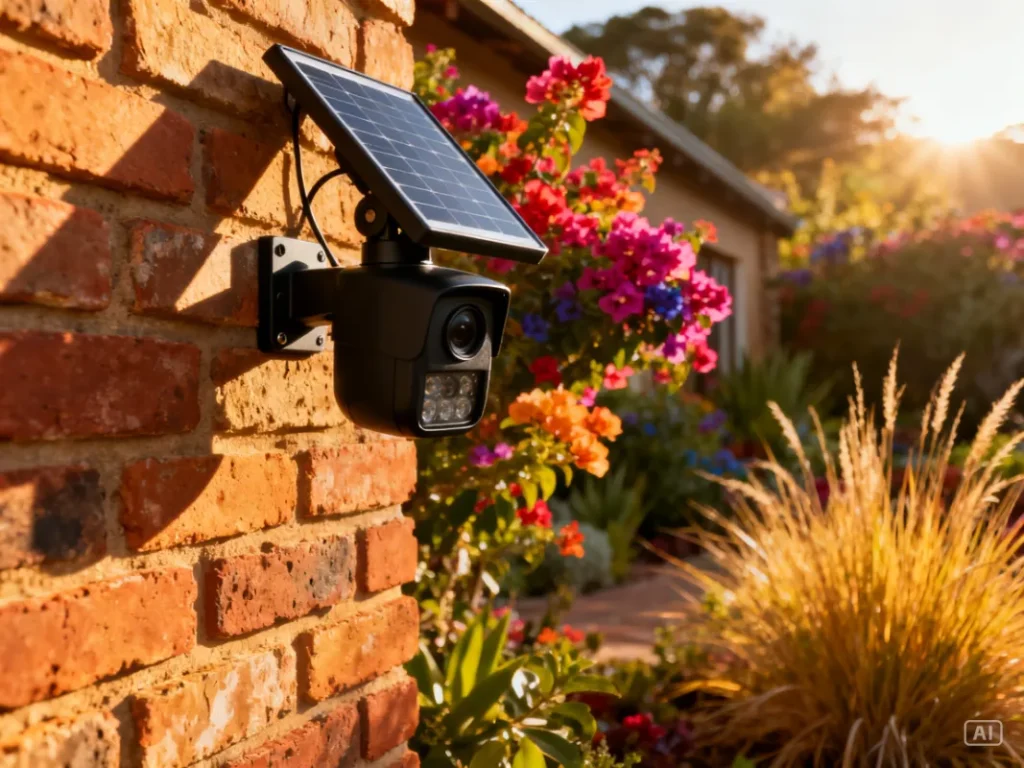
Face the panel north. This is the single most impactful thing you can do. A north-facing panel in South Africa receives sun from morning to late afternoon. A south-facing panel barely charges at all. If your camera’s battery is consistently low, this is the first thing to check and fix.
Avoid shade at peak sun hours. A panel shaded between 10am and 2pm — peak solar hours — loses the majority of its daily charging potential. Even partial shade from a tree branch or roof overhang during these hours cuts your charging significantly. Reposition if necessary.
Adjust your motion detection sensitivity. In the app, reduce sensitivity and narrow the detection zone to cover only the area you genuinely need monitored. Fewer false triggers means fewer unnecessary wake-up cycles and meaningfully better battery preservation overnight.
Use motion-activated recording, not continuous recording. Some cameras offer a continuous recording mode — avoid it unless you have a very high-capacity battery. Motion-activated recording preserves battery by keeping the camera in low-power standby between events. For most SA homes, motion-activated recording captures everything that matters anyway.
Keep the solar panel clean. Dust, bird droppings, and grime build up on the panel surface and reduce charging efficiency. A quick wipe with a damp cloth every 4–6 weeks — especially during dry Highveld winters when dust is heavy — makes a noticeable difference to charging performance.
How to Check Your Battery Status
Most solar camera companion apps display real-time battery percentage and solar charging status on the device dashboard. Open your app, select the camera, and look for a battery icon or a dedicated “Device Info” or “Power” section. You should be able to see the current battery percentage and whether the solar panel is actively charging.
Check this once a week for the first month after installation — it gives you a clear picture of how your specific setup performs under your local conditions. If the battery percentage is trending downward week on week, you have a positioning problem to fix before it becomes a flat battery problem. If it’s sitting steady between 80–100%, your setup is working exactly as it should.
Some cameras also send low-battery push notifications when the charge drops below a threshold — usually 20% or 30%. Enable this in your app settings so you’re never caught off guard.
When Should You Manually Recharge the Battery?
In a well-positioned solar camera setup, manual recharging should almost never be necessary. If you find yourself needing to manually recharge more than once every few months, something in your setup needs addressing — most likely panel direction, shading, or motion sensitivity.
That said, there are legitimate scenarios where a manual charge makes sense. If you’re entering a prolonged stretch of genuinely bad weather — a full week of overcast skies during a Cape winter cold front, for example — plugging in via USB to top up the battery before the weather hits is sensible forward planning. Similarly, if you’ve just installed a brand new camera and want to start it at full capacity while the panel catches up, an initial USB charge is worthwhile.
Use the USB cable provided in the box and charge via any standard 5V USB adapter. Most solar camera batteries reach full charge in 4–8 hours via USB, depending on capacity.
Zack’s Verdict
Battery life on a solar camera is one of those things that sounds complicated but really isn’t once you understand the basics. Face the panel north, keep it clean and unshaded, tune your motion settings, and put an SD card in so load shedding doesn’t create gaps in your footage. Do those four things and your camera will look after itself for years without you touching it. The technology is genuinely reliable — South Africa’s sunshine is one of the best assets you have when it comes to solar-powered security. Use it properly and you won’t look back.
Frequently Asked Questions
1. How long does a solar camera battery last without sunlight in South Africa? Most quality solar cameras last between 2 and 7 days on a full battery charge with no solar input. In South Africa’s climate, reaching full depletion under normal conditions is rare — the solar panel continuously replenishes the battery during daylight hours.
2. Does load shedding drain my solar camera battery? No. Load shedding affects your mains power and WiFi router, but has no impact on your solar camera’s battery. The camera runs entirely off its own solar-charged battery system, independent of the grid. Recording continues throughout any load shedding stage.
3. What mAh battery capacity do I need for a South African home? For most urban and suburban SA homes, 10,000–15,000 mAh is the practical sweet spot. It handles several consecutive cloudy days comfortably while keeping the camera housing a manageable size. Remote or high-traffic installations benefit from 18,000 mAh and above.
4. Why is my solar camera battery draining faster than expected? The most common causes are a south-facing or shaded solar panel, high motion event frequency, weak WiFi signal forcing constant reconnection, or extreme temperatures affecting lithium battery performance. Check panel direction and shading first — these fix 80% of battery drain issues.
5. How often should I clean my solar camera panel? Every 4–6 weeks is a good maintenance interval for most SA locations. During dry Highveld winters when dust accumulates heavily, clean monthly. A damp cloth is all you need — no chemicals required.
6. Can I manually charge a solar camera battery? Yes. Most solar cameras include a USB charging port for manual top-ups. Use the provided cable and a standard 5V USB adapter. A full manual charge typically takes 4–8 hours depending on battery capacity.
7. Does night vision use a lot of battery on a solar camera? Yes — IR night vision LEDs are one of the more power-hungry features on a solar camera. If your camera is triggering night vision frequently due to movement in the monitored area, expect higher-than-average battery consumption overnight. A larger battery capacity (15,000 mAh+) helps in these situations.
8. Will my solar camera battery last through a South African winter? Yes, with the right setup. South African winters are sunny even if cold — Johannesburg averages 8+ hours of sunshine per day in winter. Battery performance does drop slightly in cold temperatures, but the solar charging more than compensates. Cape Town’s winter is cloudier; if you’re in the Cape, opt for a higher-capacity battery model.
Bottom Line — Set It Up Right and Forget About It
Solar camera battery life in South Africa is genuinely not something you should have to worry about once the camera is correctly installed. The country’s sunshine is exceptional by global standards, and a north-facing panel with clear sky exposure will keep your battery healthy through load shedding, through winter, and through years of daily use. Focus on the setup decisions — panel direction, shade avoidance, motion sensitivity — and the battery looks after itself from there.
For everything you need to know about getting the most from your solar security setup, visit the ultimate guide to solar security cameras in South Africa at Zacks Bargains. And if you’re ready to upgrade, browse our full range of solar cameras built specifically for South African conditions.


