Budget Load Shedding Survival Kit — Stay Prepared Without Breaking the Bank
Nobody signed up for load shedding, and nobody should have to spend a small fortune just to survive it comfortably. A budget load shedding survival kit built with the right products can cost under R500 and cover everything a South African household needs to get through daily blackouts without candles, cold food, dead phones, and frustrated kids. The secret isn’t spending more — it’s spending smart on the items that actually make a difference.
This guide builds your complete kit from the ground up, tells you exactly what to prioritise first, and shows you how to stretch every Rand without compromising on the things that matter most during a blackout.
What Should a Budget Load Shedding Survival Kit Include?
A budget load shedding survival kit needs to cover four basic needs: light, power, connectivity, and safety. Everything else is a nice-to-have that you can add later once the essentials are sorted. Trying to solve every load shedding problem at once is how people end up spending R3,000 on gadgets they didn’t need and missing the basics that would have actually helped.
Start with what affects your household most directly. For most South African families that means lighting first, phone power second, and WiFi third. Get those three sorted within your budget and you’ve solved eighty percent of daily load shedding frustration immediately.
The Core Items Every Budget Load Shedding Survival Kit Needs
These are the non-negotiables — the items that deliver the most practical value per Rand spent. None of these are luxury purchases. Every item on this list earns its place through genuine daily usefulness.
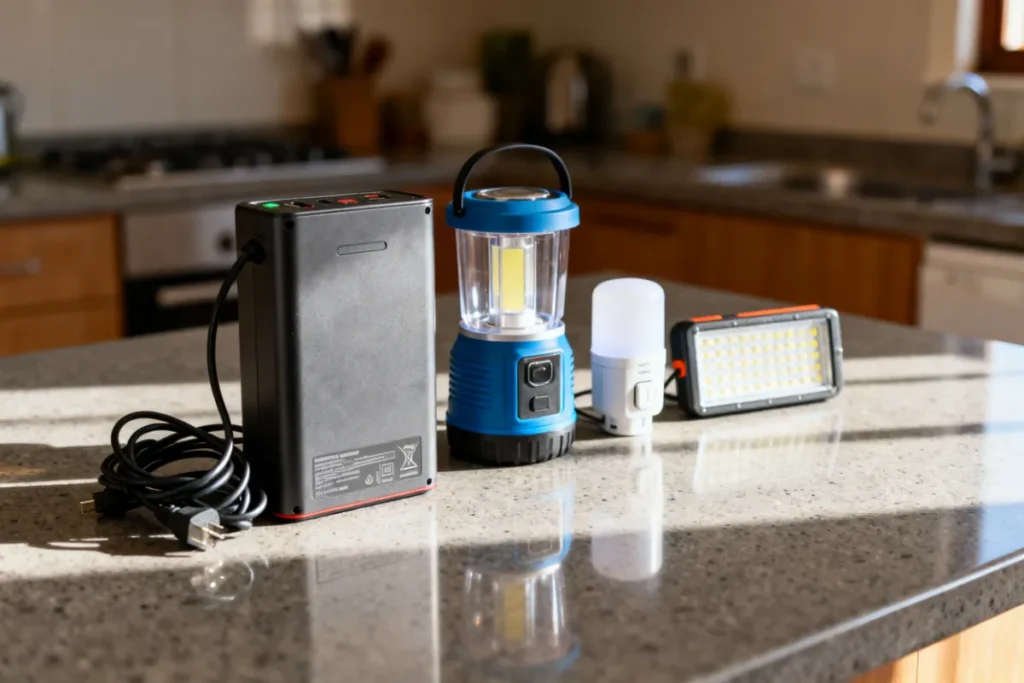
A Rechargeable Emergency Lantern (R180–R350)
This is your single most important load shedding purchase and the first item to buy. A quality rechargeable lantern charges via USB during the day and lights up an entire room for 4–6 hours per charge — enough to cover any scheduled load shedding slot. It’s portable, it’s safe around children, and unlike candles it won’t set your curtains alight. Look for one with at least 200 lumens and a battery capacity of 2000mAh or higher.
Solar Rechargeable Camping Lantern
A Plug-In Auto-Switch Emergency Light for the Passage (R80–R150)
This is the most underrated item on this list. It plugs into a wall socket, charges continuously, and switches on automatically the moment load shedding hits — no fumbling in the dark, no manual switching required. For passages, stairways, and bathrooms, this is a safety essential that costs less than a restaurant lunch. Buy one for every dark passage in your home.
A High-Capacity Power Bank (R250–R450)
Your phone is your most critical emergency tool during load shedding — it’s your torch, your communication device, your hotspot, and your entertainment. A power bank with at least 20,000mAh keeps your phone and a second family member’s device charged through multiple load shedding slots without needing a wall socket. Don’t cut corners here — a cheap power bank with an inflated mAh rating is one of the most common disappointments in load shedding prep.
A COB LED Work Light (R80–R150)
For kitchens and home offices where you need bright, even task lighting rather than ambient glow, a COB LED work light is extraordinary value. The COB (Chip-on-Board) LED technology packs significantly more brightness per Rand than standard LED lanterns. At under R150 for a quality unit — sometimes less for a twin pack — this is the budget pick that consistently surprises people with how well it performs.
How to Build Your Budget Load Shedding Survival Kit in Three Phases
Buying everything at once isn’t necessary and isn’t realistic for most South African household budgets. This phased approach builds a complete kit over three months without financial strain.
Phase 1 — Week One (Under R300): Light and Safety
Buy a rechargeable lantern and a plug-in auto-switch emergency light for the passage. These two items immediately solve the most disruptive part of daily load shedding — darkness — and cost less than a tank of petrol. This is your foundation. Everything else builds on top of it.
Phase 2 — Month Two (R250–R450): Power and Connectivity
Add a high-capacity power bank. If you’re on fibre and losing your internet connection during load shedding is affecting your work or your children’s schooling, add a mini UPS for your router as well. By the end of phase two, your household has light, charged devices, and a working internet connection through every load shedding slot.
Phase 3 — Month Three (R150–R300): Bright Task Lighting and Backup
Complete the kit with a COB LED work light for the kitchen and a solar lantern as your independent backup — the one light source that keeps working even if you forget to charge everything else, because it charges itself from sunlight. At this point your budget load shedding survival kit is genuinely complete and costs less than R1,000 total built over three months.
Budget Load Shedding Survival Kit — Full Cost Breakdown
Transparency matters. Here’s exactly what a complete kit costs when you buy smart, without inflated retail markups or unnecessary extras.
| Item | Purpose | Budget Price Range |
|---|---|---|
| Rechargeable LED lantern | Main room lighting | R180–R350 |
| Plug-in auto-switch emergency light | Passage and bathroom safety | R80–R150 |
| High-capacity power bank (20,000mAh) | Phone and device charging | R250–R450 |
| COB LED work light | Kitchen and task lighting | R80–R150 |
| Solar rechargeable lantern | Independent backup lighting | R180–R300 |
| Total | Complete kit | R770–R1,400 |
Built over three months, that’s R257–R467 per month — manageable for most households. Built all at once, it’s still less than a single month’s generator fuel costs for most families running a petrol generator through daily load shedding.
What to Avoid When Building a Budget Load Shedding Survival Kit
Spending less doesn’t mean buying badly. These are the common mistakes that waste budget and leave families underprepared despite spending money.
- Buying candles as a primary light source. Candles are a fire risk, produce no useful light for reading or working, and cost money repeatedly. One rechargeable lantern replaces candles permanently and costs less over three months of load shedding than candles do.
- Choosing a power bank based on price alone. Cheap power banks with inflated capacity claims are the most common load shedding gadget disappointment. A 20,000mAh rating on a R99 power bank and a R350 power bank are not the same thing — the cheap one will fail within months or deliver a fraction of its claimed capacity.
- Ignoring the passage and staircase. Most load shedding injuries happen in dark passages and on unlit stairs. A R120 auto-switch plug-in light prevents falls that could send a family member to the emergency room — it’s the highest-value safety purchase on this entire list.
- Buying a generator instead of gadgets. A generator costs R3,000–R15,000 to buy, R500–R2,000 per month in petrol, requires maintenance, produces dangerous carbon monoxide if used incorrectly, and gets stolen. A complete budget load shedding kit costs under R1,000 total and lasts for years.
- Forgetting to charge before load shedding hits. A dead power bank and an uncharged lantern are useless. Build charging into your daily routine — plug everything in as soon as power comes back and your kit will always be ready.
For a broader look at how a complete load shedding survival setup comes together across every product category, the Essential Gadgets Every Home Needs During Load Shedding is the reference your household needs.
Step-by-Step: Setting Up Your Budget Load Shedding Survival Kit at Home
Follow this setup process once and your household will be prepared for every load shedding slot from that day forward.
- Install the plug-in auto-switch emergency light first. Find the wall socket closest to the middle of your main passage and plug it in. It will start charging immediately and activate automatically during the next load shedding slot.
- Charge your rechargeable lantern fully before first use. Most lanterns need 6–8 hours on the first charge. Do this during the day so it’s ready for the evening slot.
- Place the lantern in the room your family uses most during load shedding. Usually the lounge or kitchen — wherever everyone gathers when the power goes out.
- Charge your power bank and keep it in a fixed, accessible location. A kitchen drawer or beside the TV unit works well — somewhere every family member knows to find it.
- Position the COB LED work light in the kitchen. Set it up to illuminate the counter and stove area where you’ll be cooking during blackouts.
- If you have a solar lantern, put it on your sunniest windowsill now. It charges passively from that point forward — no action required each day.
- Do a test run before you need it. Switch off the mains at the distribution board and walk through your home. Every area should have adequate light. Adjust placement of portable lights as needed.
Zack’s Verdict
The biggest load shedding mistake South African families make isn’t buying the wrong things — it’s buying nothing and hoping for the best. A budget load shedding survival kit doesn’t ask for much: a lantern, a plug-in passage light, and a decent power bank gets most households through daily blackouts without drama. You can build that core kit for under R500 in week one. Everything after that — the COB kitchen light, the solar backup, the mini UPS for the router — is an upgrade that makes life more comfortable, not a prerequisite for coping. Start small, start now, and add to it over time. Load shedding is not going away, and being underprepared is a choice you make every day you put this off.
FAQ
Q: What is the minimum I need to spend on a load shedding survival kit?
A: A functional minimum kit — one rechargeable lantern and one plug-in auto-switch emergency light — costs R260–R500 depending on quality. That covers your two most urgent needs (portable room light and safe passage navigation) and is a complete starting point for any household budget.
Q: Can I build a budget load shedding survival kit for under R500?
A: Yes. A rechargeable lantern (R180–R350) plus a plug-in auto-switch emergency light (R80–R150) comes in under R500 and solves the most disruptive daily load shedding problems immediately. Add a power bank and COB light in subsequent months as budget allows.
Q: Is a power bank really necessary for a load shedding kit?
A: For most South African households, yes. Your phone is your torch, your communication device, and often your hotspot during load shedding. A flat phone during an extended blackout leaves your household genuinely vulnerable. A 20,000mAh power bank costing R250–R450 is one of the highest-value purchases in the entire kit.
Q: How long will the items in a budget load shedding survival kit last?
A: Quality rechargeable lanterns and LED lights typically last 3–5 years with daily use before battery capacity degrades noticeably. Power banks generally maintain strong performance for 2–3 years. The LED components themselves last significantly longer — most are rated for 25,000–50,000 hours of use.
Q: Should I buy individual items or a pre-packaged load shedding kit?
A: Individual items almost always deliver better value per Rand than pre-packaged kits. Packaged kits typically include low-quality versions of each item to hit an attractive total price point. Buying individual items from a reputable retailer lets you choose quality where it matters most — especially the power bank and lantern.
Q: What is the most important single item in a budget load shedding survival kit?
A: The rechargeable lantern. It directly replaces the most dangerous common load shedding habit (candles), solves the most immediate problem (darkness in your main living area), and is useful every single day. If you can only buy one item, buy the lantern first.
Q: Do I need a gas stove as part of my load shedding kit?
A: A gas stove or camping cooker is a useful addition once your lighting and power basics are covered, but it’s not a first-phase purchase for most households on a tight budget. Many families manage load shedding meals with cold options, pre-cooked food, or a gas braai they already own. Add cooking solutions in phase three once lighting and power are sorted.
Q: How do I stop my family from using emergency gadgets for everyday purposes and running them flat?
A: Designate emergency gadgets as off-limits for casual use and keep them in a fixed emergency location. Explain to children why the power bank and lantern stay charged and ready. For power banks especially, set a household rule: emergency gadgets charge from the wall when power is on and are not used for convenience charging of devices that can charge from a wall socket.
Build Your Kit, Beat Load Shedding
Load shedding is a long-term South African reality, and a budget load shedding survival kit is the most practical response any household can make. It costs less than most people expect, takes an afternoon to set up, and pays for itself the first time your family gets through a 4-hour Stage 6 blackout without stress, without candles, and without a flat phone.
Browse the full range of affordable load shedding solutions at Zacks Bargains — practical products at honest prices, built for South African families who want to be prepared without overspending.


